Cutting soft fabric cleanly can be tricky, especially around curves, corners and layered materials. Sterling Black Panther Tailoring Shears help you make cleaner, more controlled cuts, so it is easier to keep edges neat and line pieces up before sewing.
If you are looking for a practical beginner-friendly sewing project, a baby bib and matching drool blanket set is a good place to start. It is simple to make, useful to keep on hand, and a good way to practise clean cutting and basic construction.
Why clean fabric cutting matters in sewing
Accurate fabric cutting helps sewing projects come together more smoothly. Uneven edges, rough curves or bulky corners can make it harder to align fabrics and achieve a neat finish.
When cutting cotton fabric, terry towelling or layered sewing materials, sharp tailoring shears help reduce snagging and allow for cleaner curves and straighter edges.
Sterling Black Panther Tailoring Shears are suited to a range of sewing and fabric-cutting tasks, including:
- Sewing projects for beginners
- Cutting cotton fabric
- Cutting terry towelling and soft fabrics
- Trimming seam allowances
- Clipping curved seams
- Preparing fabric for quilting and craft projects
Here is a step-by-step guide to making a baby bib and matching drool blanket using Sterling Black Panther Tailoring Shears:
Materials you will need
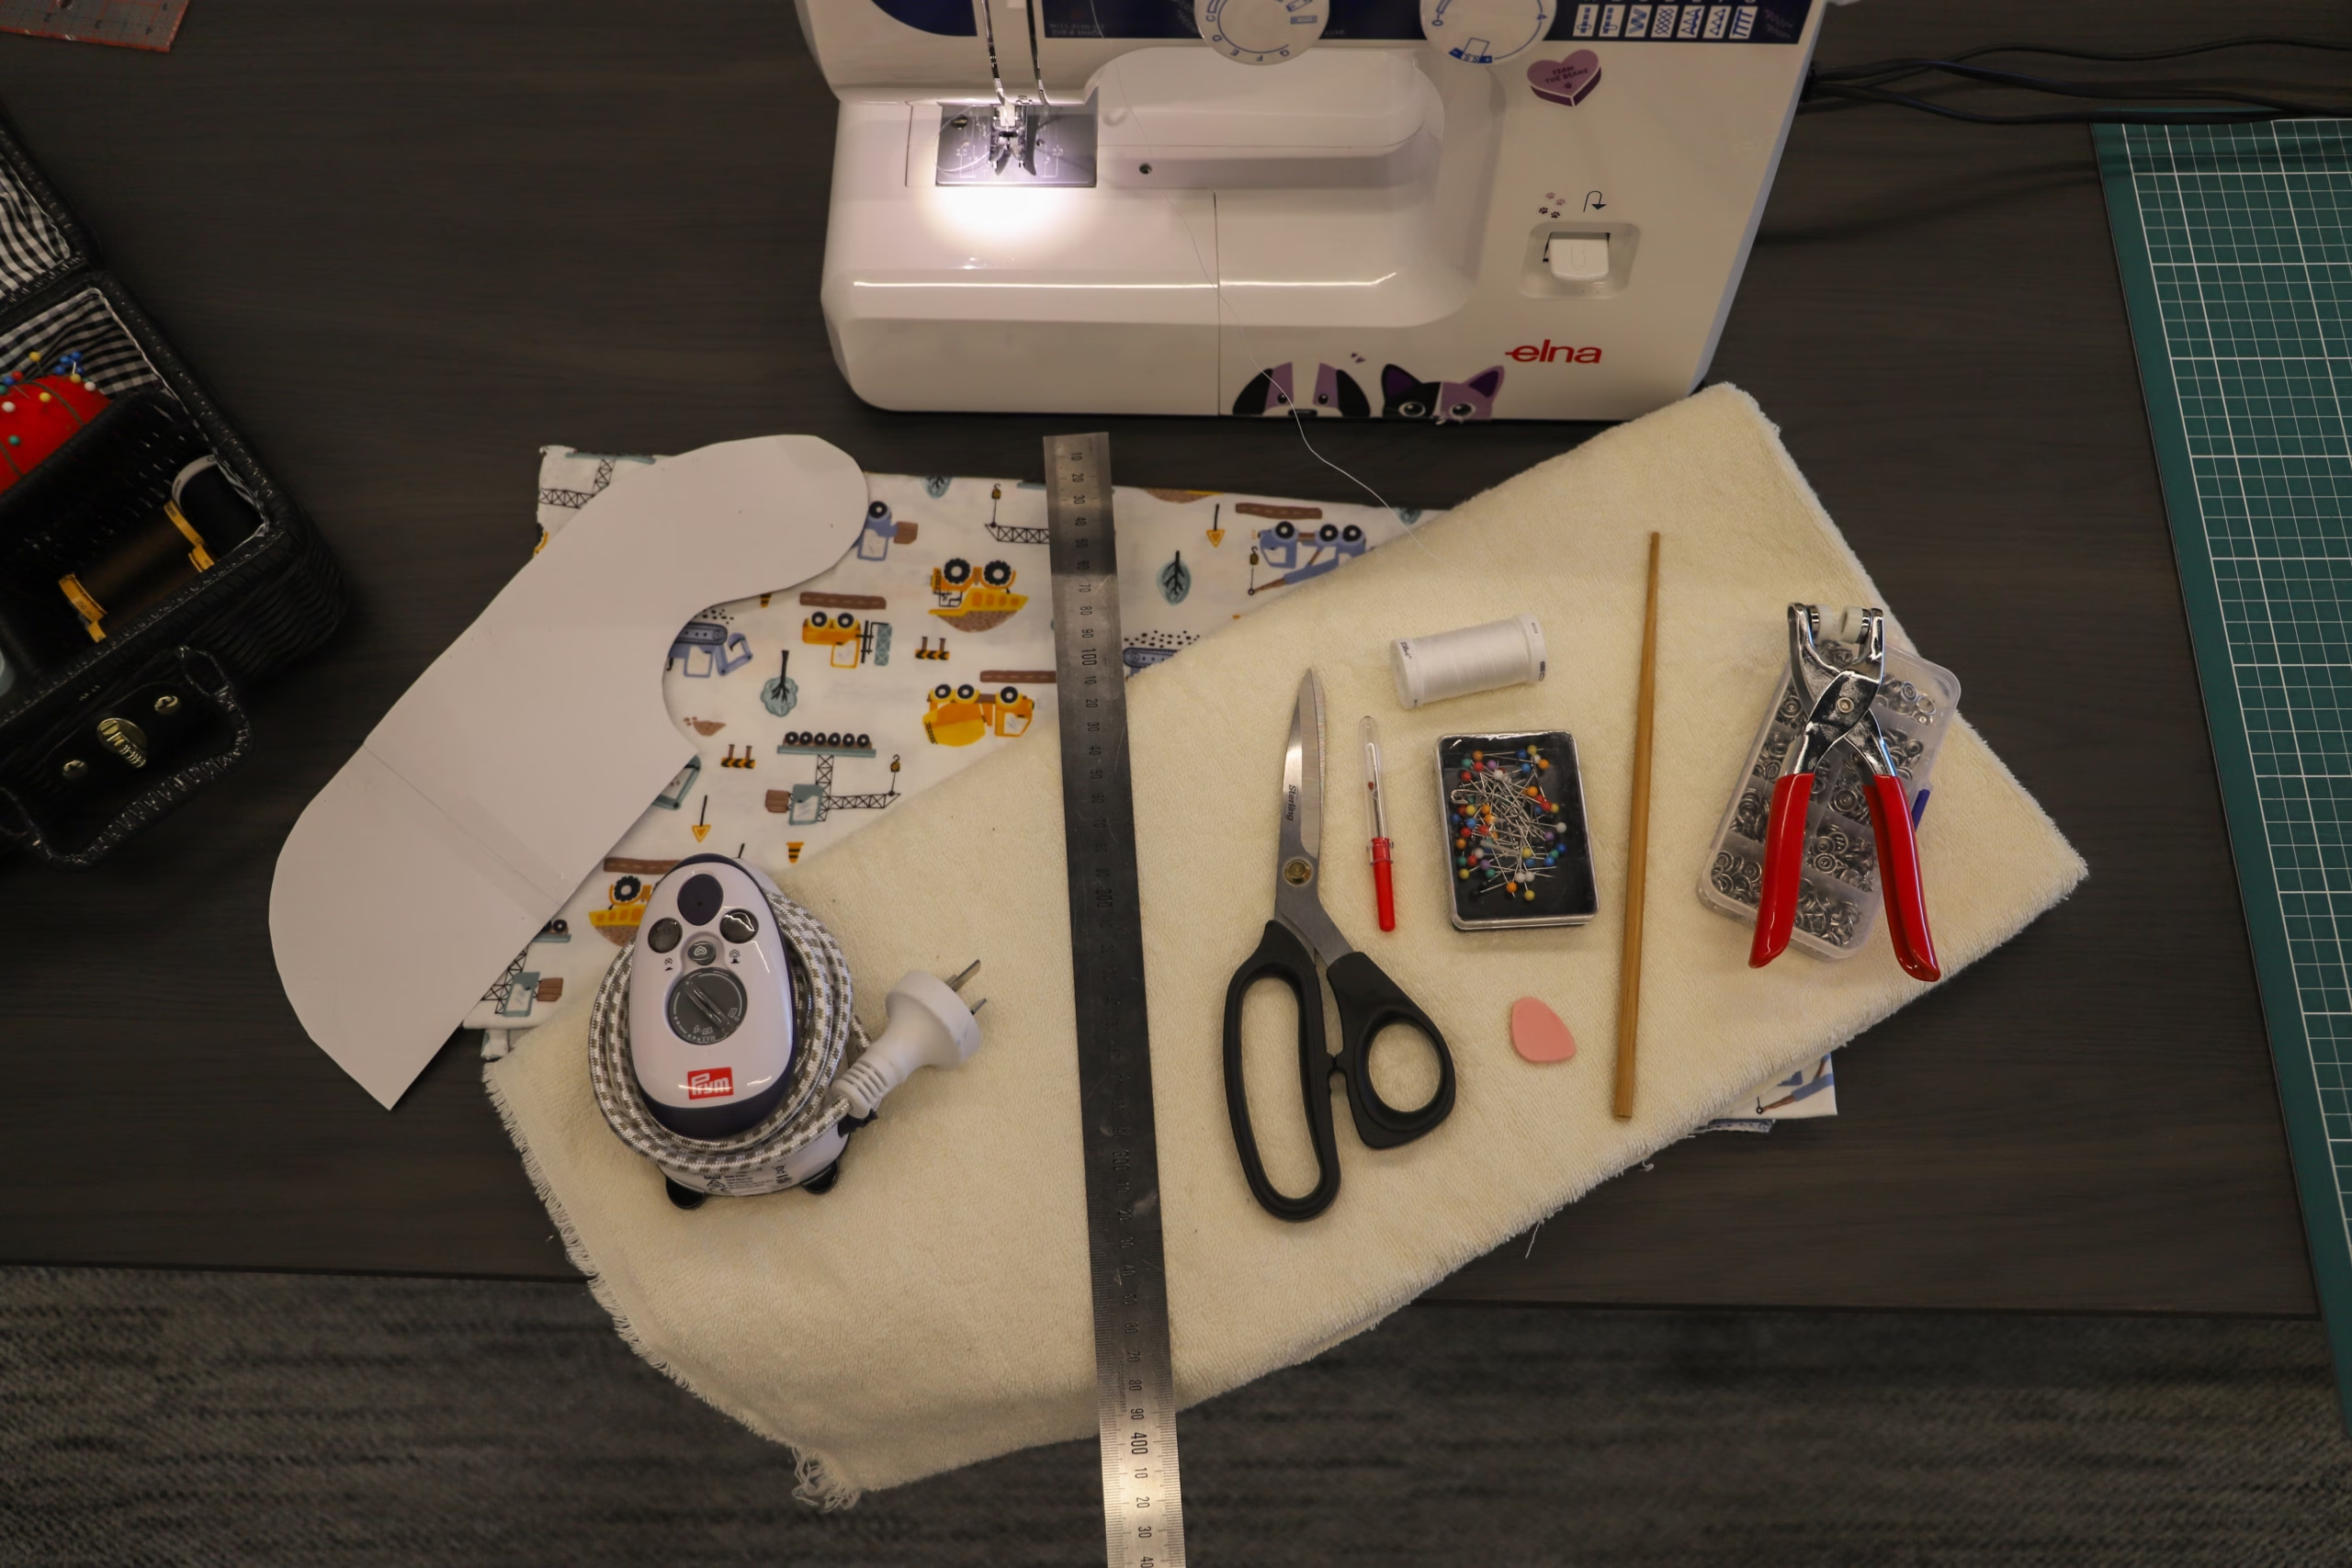
For the baby bib
- Soft cotton fabric for the front
- Terry towelling for the back
- Tailor’s chalk or fabric marker
- Pins or sewing clips
- Sterling Black Panther Tailoring Shears
- Sewing machine and matching thread
- Iron
- Point Turner/Chopstick
- Ruler
- Snaps or press studs
For the matching drool blanket
- Soft cotton fabric for the front
- Terry towelling for the back
- Pins or sewing clips
- Sterling Black Panther Tailoring Shears
- Sewing machine and matching thread
- Point Turner/Chopstick
- Ruler
- Iron
Step-by-step guide: how to sew a baby bib
Step 1: Fold the fabric
Place your cotton fabric with the wrong side facing up, then fold it in half lengthwise. The folded edge helps create a symmetrical bib shape.
Step 2: Draw the bib pattern
Using chalk or a marker, draw half of the bib shape along the folded edge. If you are not using a pre-made pattern, aim for a finished bib size of 20 to 22 cm wide and 25 to 28 cm high. The neck opening should measure around 8 to 10 cm across in total, so when drawing on the fold, make the neck curve 4 to 5 cm out from the folded edge. Allow a 1 cm seam allowance around the edges.
Step 3: Cut the bib shape
Using Sterling Black Panther Tailoring Shears, carefully cut around the bib shape, making sure not to cut across the fold. Clean, accurate cutting here helps create smoother curves around the neck and edges. Once unfolded, you will have the full bib shape.
Step 4: Cut the towelling backing
Place the cotton bib piece onto the terry towelling and pin it in place. Cut around the shape with Sterling Black Panther Tailoring Shears so the backing matches the front. This helps both layers line up more neatly before sewing.
Step 5: Pin the pieces together
Place the cotton front and terry towelling backing with right sides facing each other. Align the raw edges and secure with pins or sewing clips.
Step 6: Stitch around the bib
Sew around the edge using a 1 cm seam allowance, leaving an opening of about 3 cm so the bib can be turned right side out.
Step 7: Trim and clip the seams
Using Sterling Black Panther Tailoring Shears, trim away excess seam allowance and clip into the curved sections. This reduces bulk and helps the bib sit more smoothly once turned. Take care not to cut into the stitching.
Step 8: Turn the bib right side out
Turn the bib through the opening so the right sides of the fabric are now facing out.
Step 9: Shape the edges
Use a chopstick, point turner or similar blunt tool to gently push out the curves and edges for a neater finish.
Step 10: Press the bib
Press the bib flat with an iron, folding the raw edges of the opening inwards so they sit neatly in line with the seam.
Step 11: Topstitch the edge
Topstitch about 5 mm from the edge all the way around the bib. This closes the opening and gives the bib a clean, finished edge.
Step 12: Attach the snaps
Attach snaps or press studs at the neck opening. If you would like the bib to be adjustable, you can add more than one snap position.
Step-by-step guide: how to sew a matching drool blanket
Step 1: Cut your fabric pieces
Cut one piece of cotton fabric and one piece of terry towelling to your preferred size. A smaller rectangular shape works well for a practical drool blanket. Using Sterling Black Panther Tailoring Shears helps keep edges clean and makes the layers easier to align before sewing.
Step 2: Layer the fabrics
Place the cotton and terry towelling pieces with right sides facing each other, then pin or clip around the edges.
Step 3: Sew around the outside
Stitch around the rectangle using a 1 cm seam allowance, leaving an opening of around 5 to 8 cm along one edge so the piece can be turned right side out.
Step 4: Trim the corners
Using Sterling Black Panther Tailoring Shears, clip the curves diagonally to reduce bulk. Be careful not to cut through the stitching. This helps the corners sit more neatly once the drool blanket is turned through.
Step 5: Turn right side out
Turn the drool blanket right side out through the opening, then gently push out the corners using a blunt tool.
Step 6: Press flat
Press the drool blanket with an iron, folding the raw edges of the opening inwards so they are neat and even.
Step 7: Topstitch to finish
Topstitch 5 mm from the edge all the way around to close the opening and give the drool blanket a clean, finished look.
Helpful sewing terms
Wrong side: the back of the fabric
Right side: the front or printed side of the fabric
Right sides together: placing the outer sides of the fabric facing inward before sewing
Seam allowance: the distance between the raw edge of the fabric and the stitching line
Topstitching: a visible line of stitching sewn close to the edge on the finished side
Clip curves: making small cuts into the seam allowance on curved areas so the fabric turns smoothly
Raw edge: the cut edge of the fabric before it is sewn or finished
Sewing tips for cleaner results
- Use sharp tailoring shears for smoother fabric cutting
- Trim seam allowances to reduce bulk
- Clip curved seams carefully for flatter edges
- Press fabric after sewing each stage
- Use sewing clips on thick fabrics like terry towelling
Final thoughts
A baby bib and matching drool blanket set is a simple project that is useful, practical and easy to personalise. With clean cutting at each stage, Sterling Black Panther Tailoring Shears can help make fabric prep easier and give you more control as you sew.

Where to Buy
Store locator is loading from StoreRocket Store Locator App..